Software Installation
pi-Stomp ships as a pre-built OS image. You point Raspberry Pi Imager at the pi-Stomp repository, pick the OS from the list, tell it your Wi-Fi details, and boot — there's nothing to download by hand, nothing to compile, and no packages to install.
What you need
-
A completed pi-Stomp (v2 or v3)
-
A computer with an SD card slot (or USB adapter)
-
Raspberry Pi Imager, v2.0.11 or newer. Here are some direct links to the latest:
Step 1 — Add the pi-Stomp repository
- Install Raspberry Pi Imager
- Open Raspberry Pi Imager.
- Click App Options
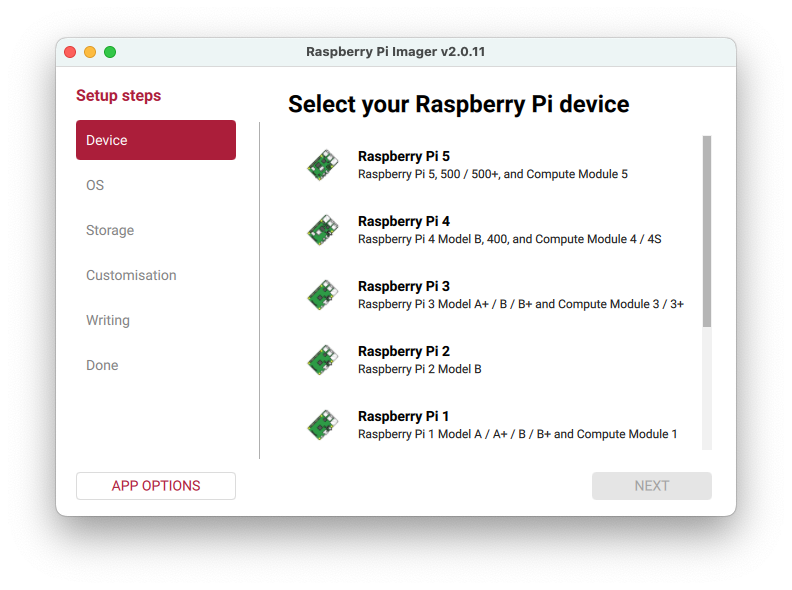
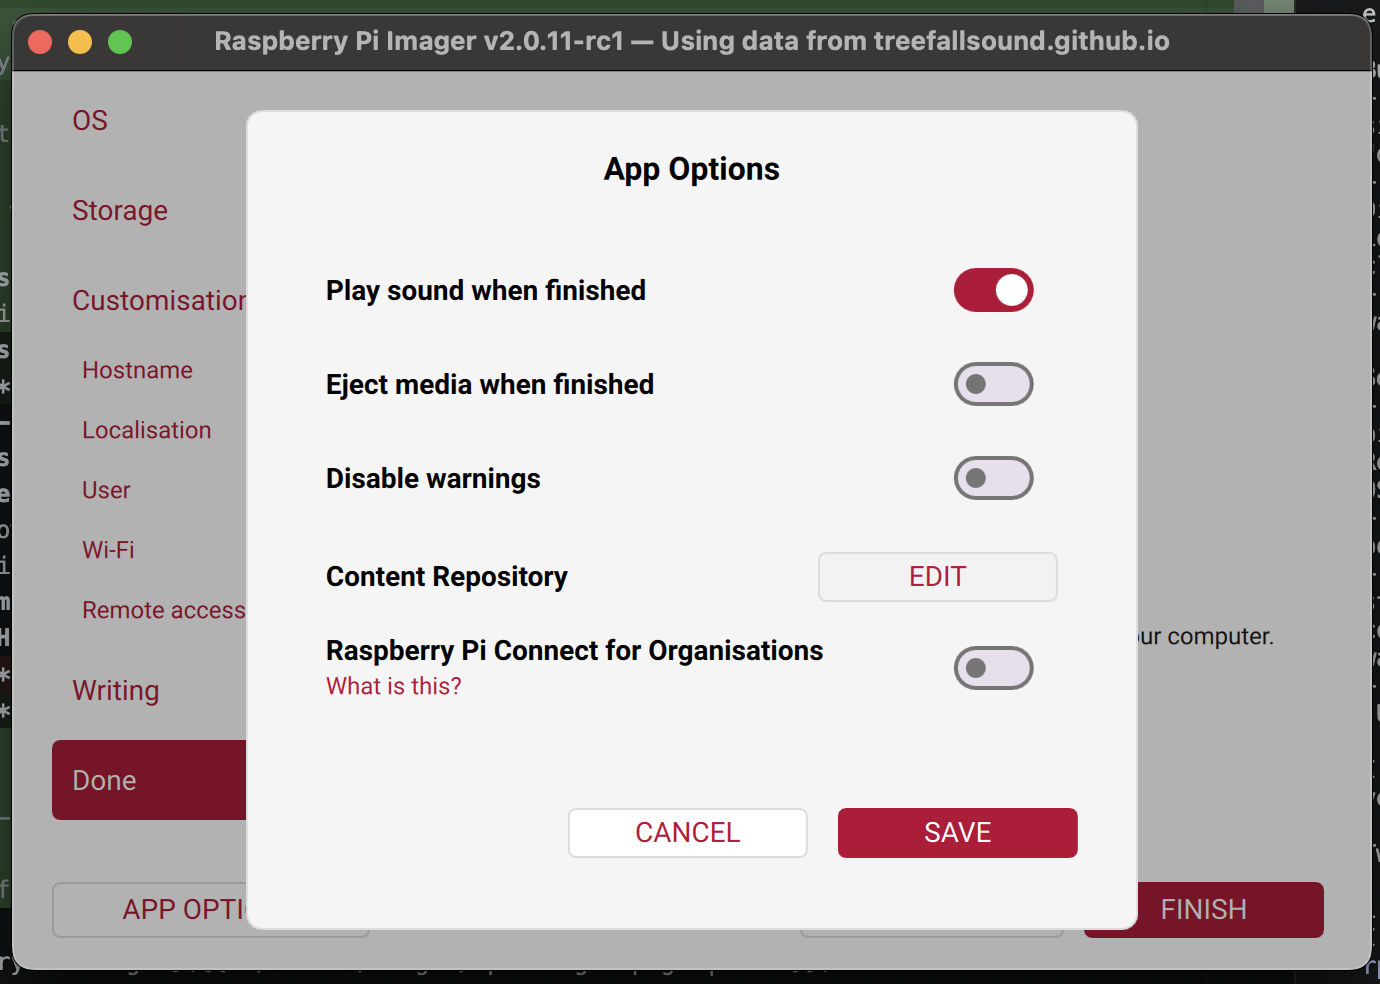
- Click Content Repository → EDIT.
- Click Use custom URL and enter (or copy/paste):
https://treefallsound.github.io/pi-gen-pistomp/imager/pistomp.json
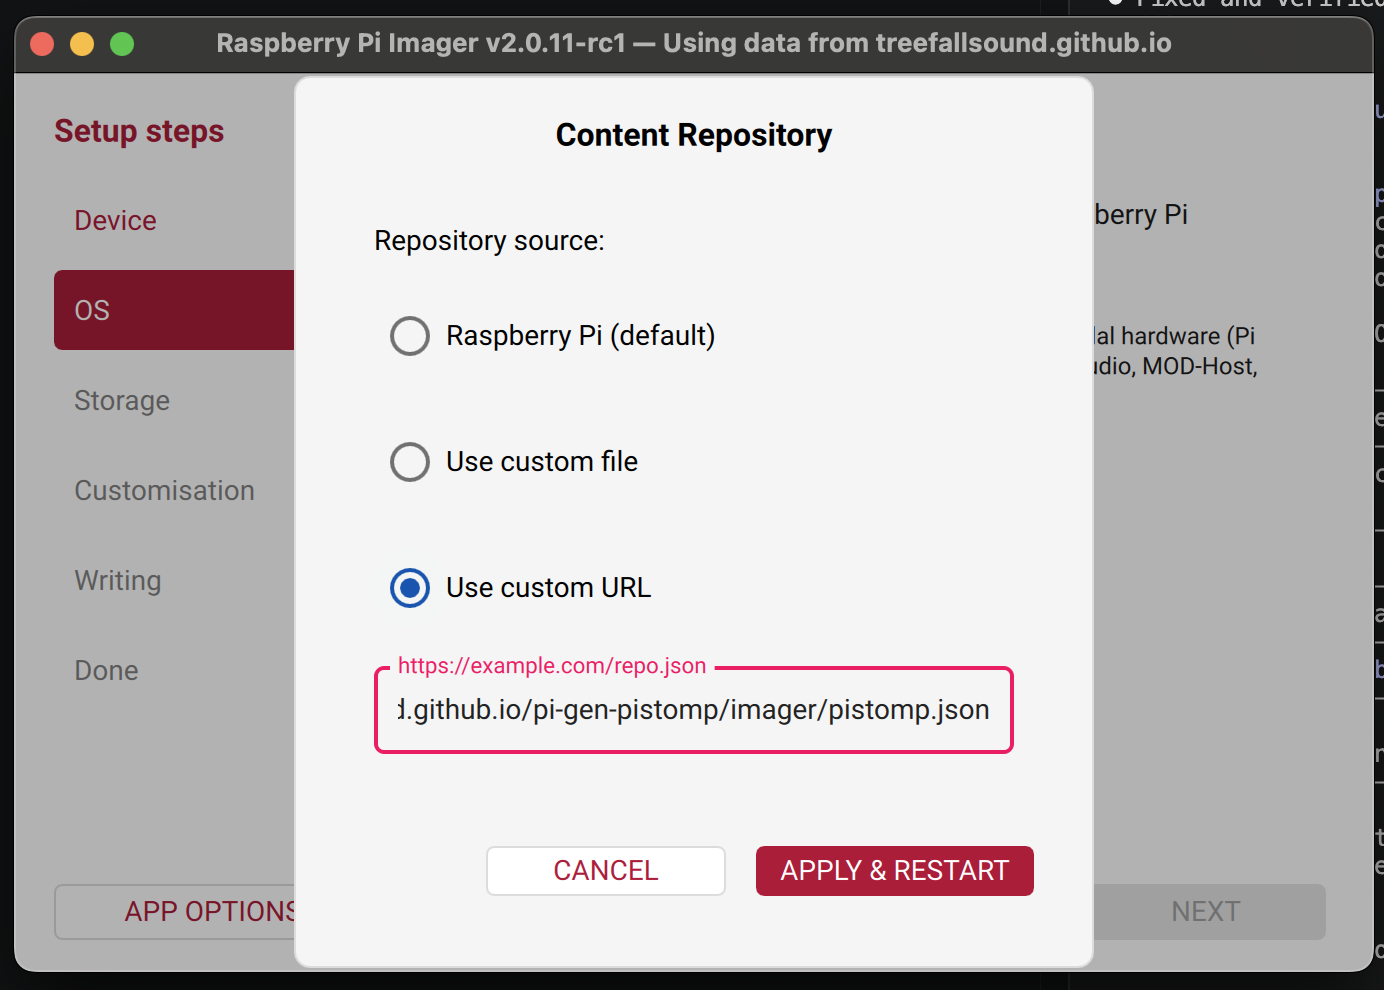
- Click APPLY & RESTART. Imager restarts with the pi-Stomp catalog loaded.
Step 2 - Select Device
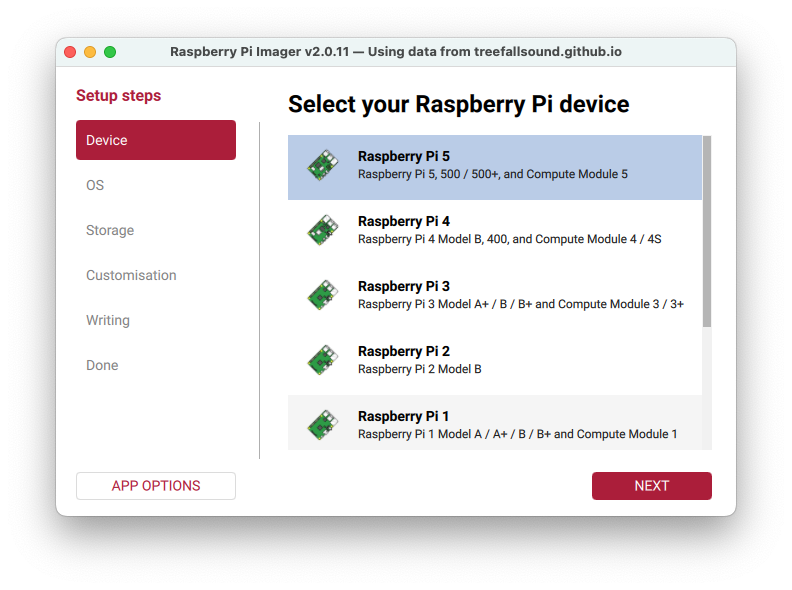
- Select your Raspberry Pi device model - typically Raspberry Pi 5 for pi-Stomp v3, Raspberry Pi 3 for pi-Stomp v2
- Click NEXT
Step 2 — Choose OS
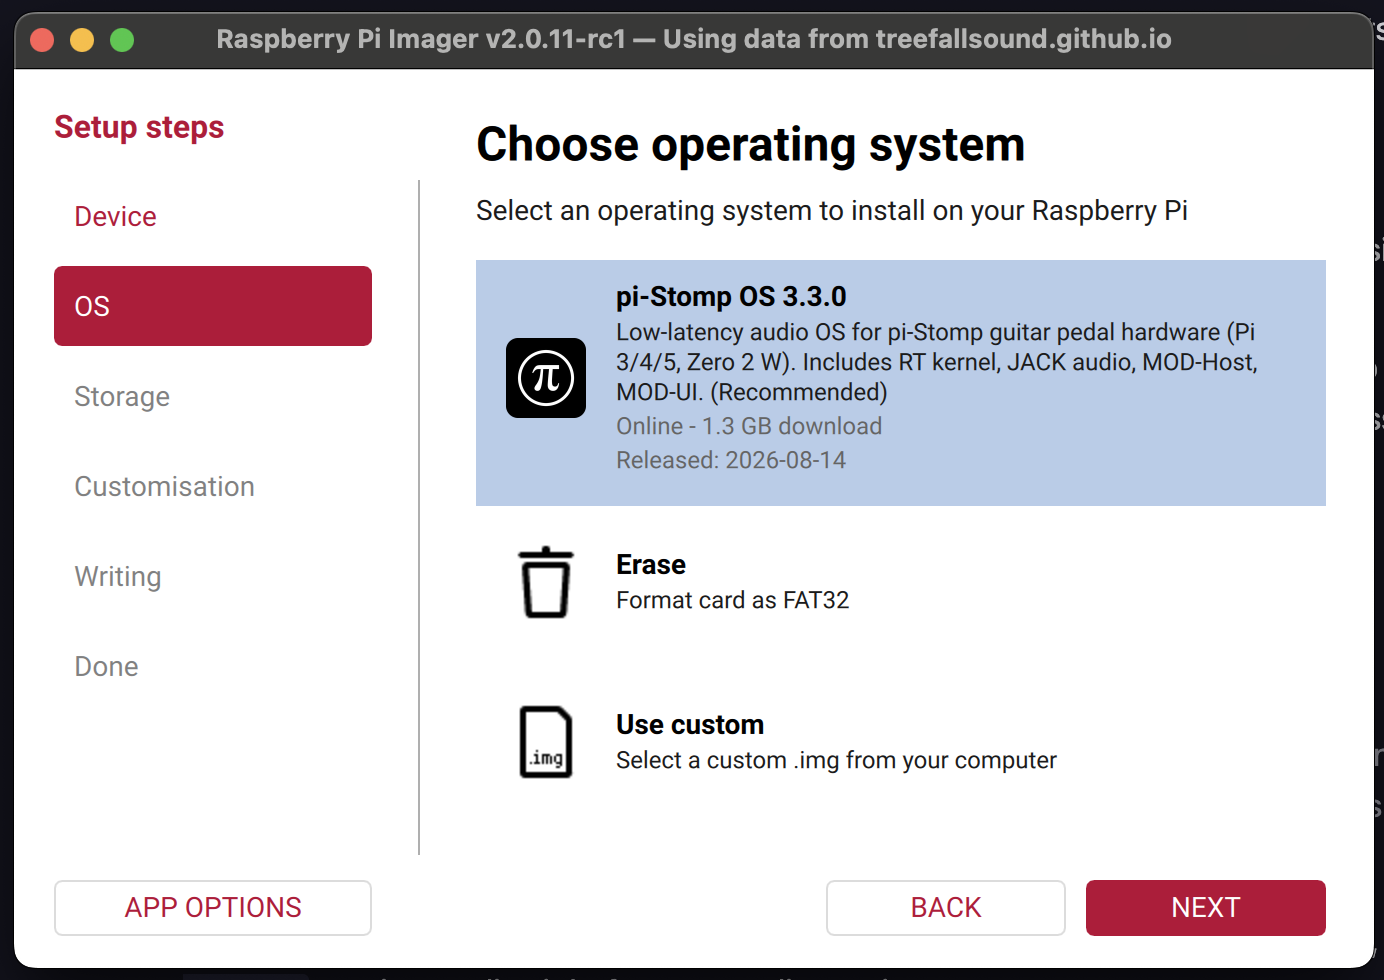
- Select pi-Stomp OS from the list. Imager downloads the image itself and verifies the checksum — no separate download step.
- Click NEXT
Step 3 - Select Storage device
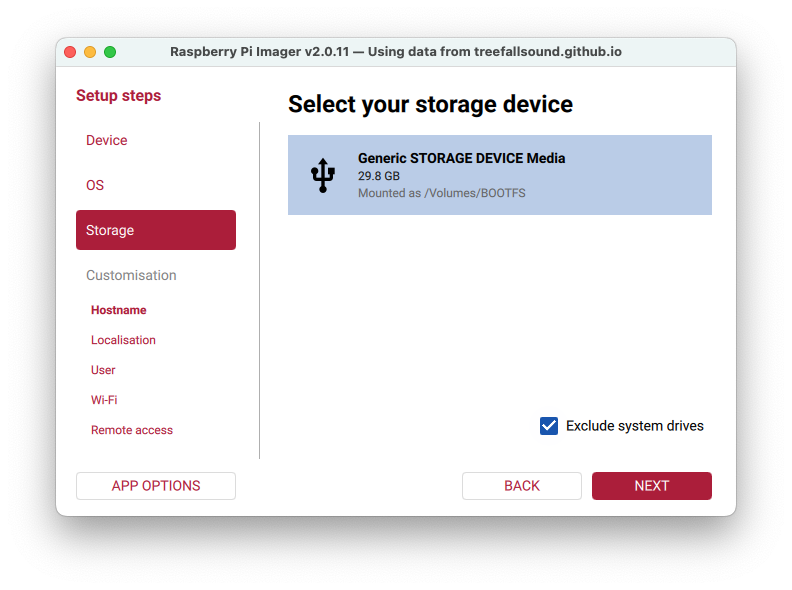
- Select the device representing your mounted SD card. If no storage device shows, make sure the SD card is properly inserted.
- Click NEXT
Step 4 - Customisation
Do not skip customisation
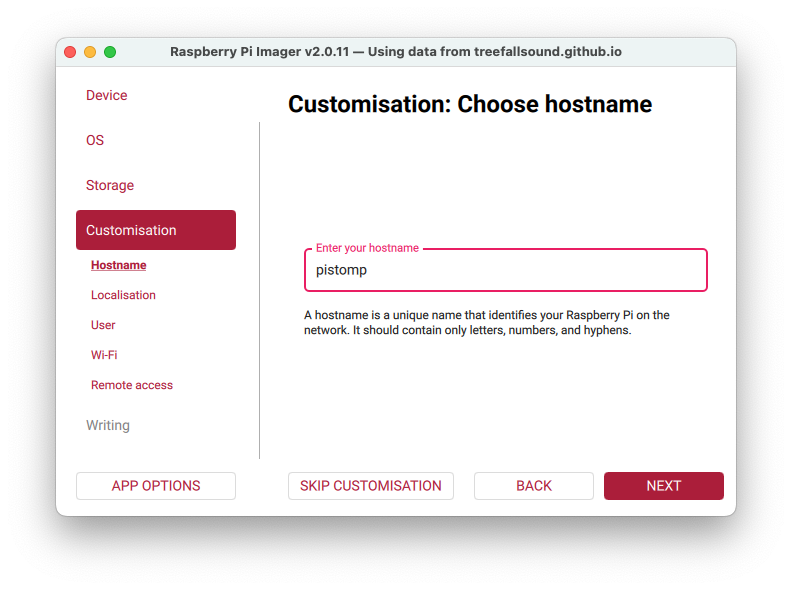
- Enter your hostname. Leave it as
pistompunless you have a reason to change it. Click NEXT
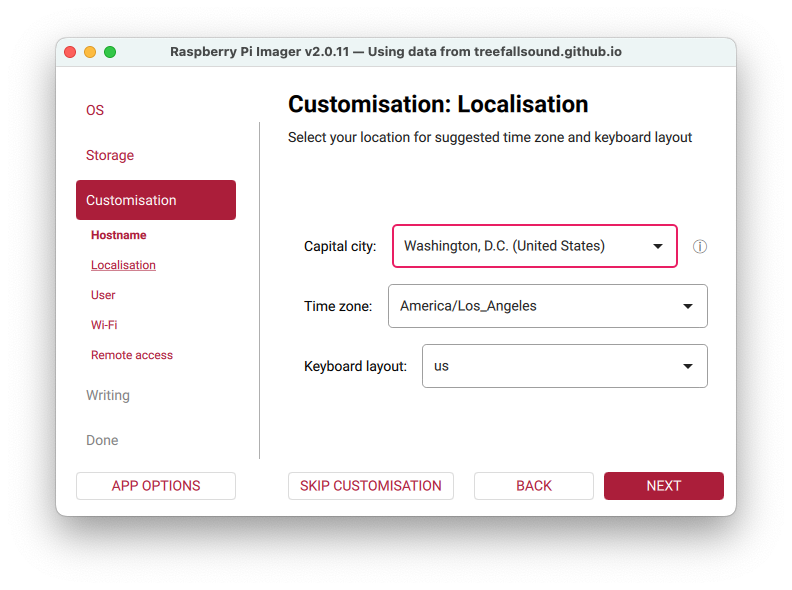
- Enter your location. City, Timezone, Keyboard layout. This is for clock syncronization and entries aren't critical. Click NEXT
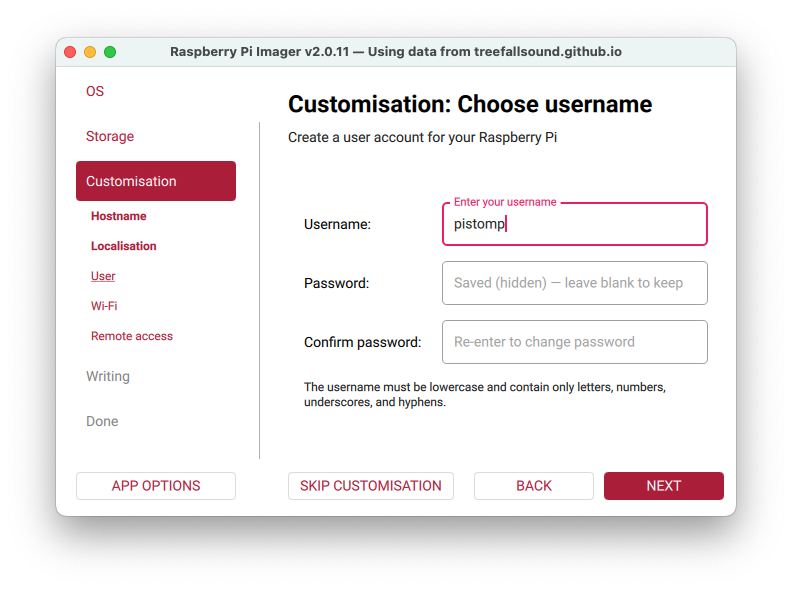
- Username must be
pistomp. Password is your choice. Remember it (or write it down) in case you ever need to ssh to the unit. Click NEXT
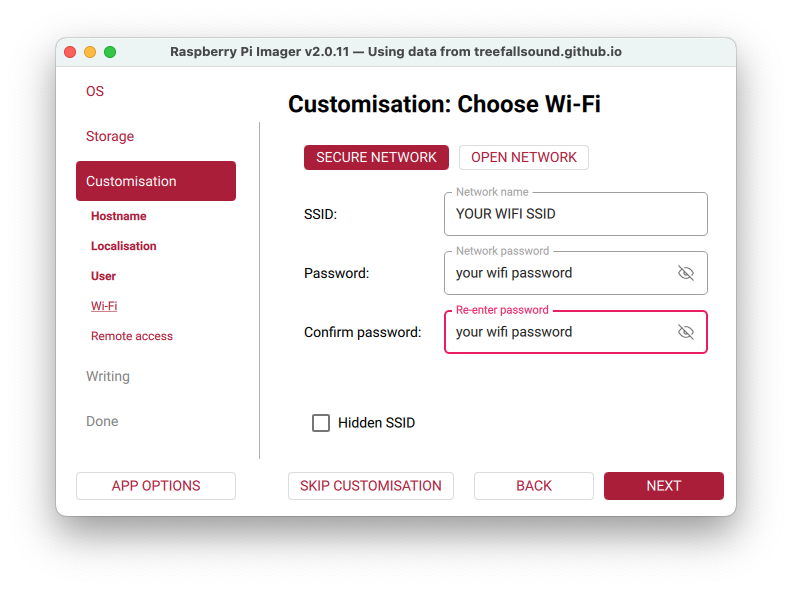
- Enter the SSID (Network Name) and Password for your router. Network name is case-sensitive. Click NEXT
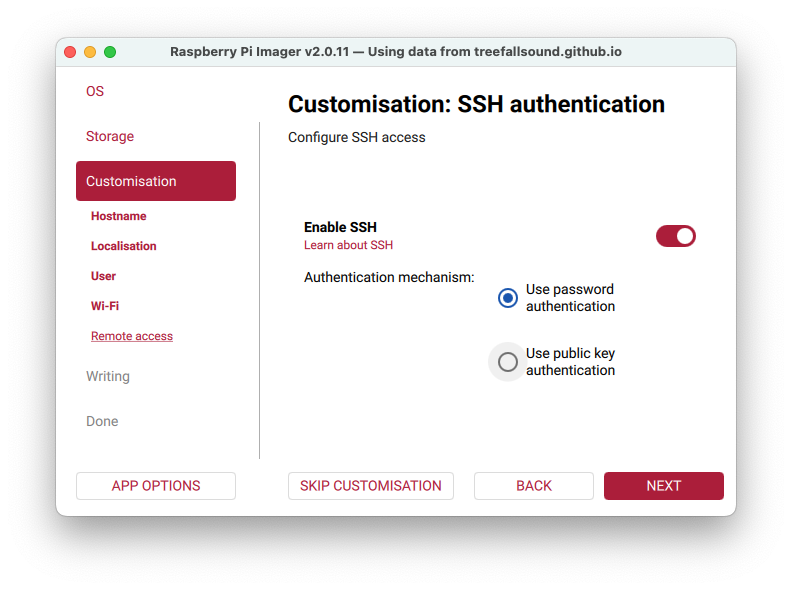
-
Choose to Enable SSH unless you know you don't want to allow it. It is very useful for troubleshooting and customisation.
-
Password versus Public key authentication is your choice. The latter requires an SSH key. Click NEXT
Step 5 - Write the image to the SD card
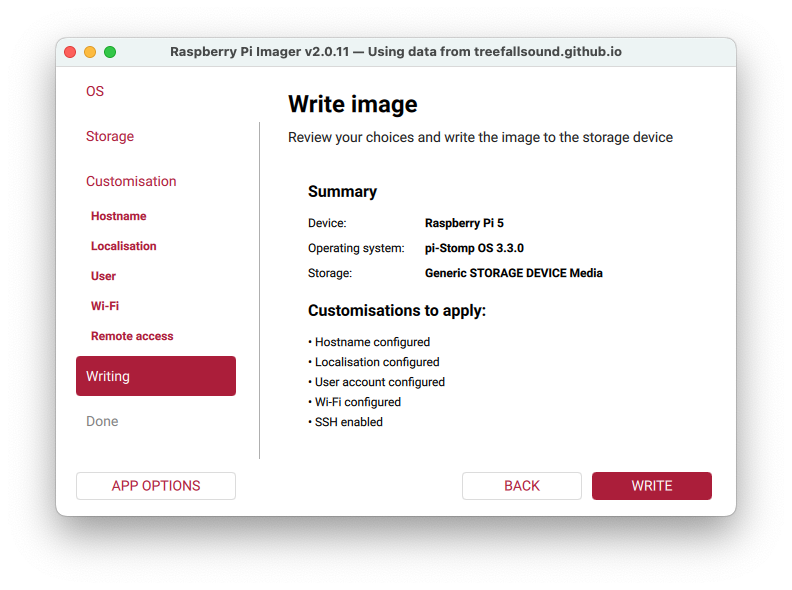
- Confirm the Summary
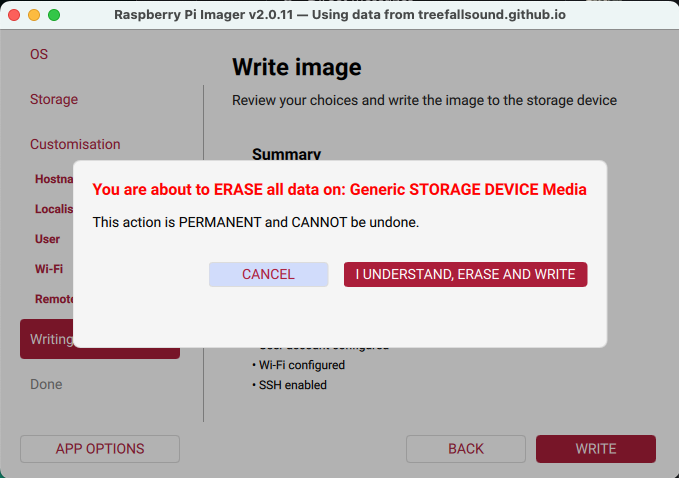
- Click WRITE
-
Click I UNDERSTAND, ERASE AND WRITE
-
Your computer opererating system may ask for access to the device (SD card). If it requires a password, that would be the password you use for your computer, not the pi-Stomp.
-
When Write and Verification are finished, eject the SD card.
Step 6 — Boot
Insert the microSD into the pi-Stomp's mainboard (inside the enclosure) and connect power. The boot splash appears on the LCD within a few seconds. First boot takes about a minute while the filesystem expands and services initialize, then the device reboots once on its own.
When the home screen appears, the pi-Stomp is on your Wi-Fi network.
Special instructions for pi-Stomp v2 (core) hardware
If your v2 hardware has an AudioInjector audio card (blue PCB, not black or green), enable the AudioInjector overlay in config.txt before first boot. While the freshly-written SD card is still connected your computer, open config.txt on the boot partition, and change the dtoverlay= lines so only AudioInjector is uncommented:
#dtoverlay=iqaudio-codec
dtoverlay=audioinjector-wm8731-audio
Eject and boot.
If you didn't set it in
config.txt, the first boot lands on the crash screen with "Cannot initialize driver". Click RECOVERY → Audio Card, pick AudioInjector, and reboot. If recovery isn't reachable, SSH in and run~/pi-stomp/util/change-audio-card.sh, choose #1 (audioinjector), then power-cycle the unit.
Step 7 — Open the Pedalboard editor (MOD-UI)
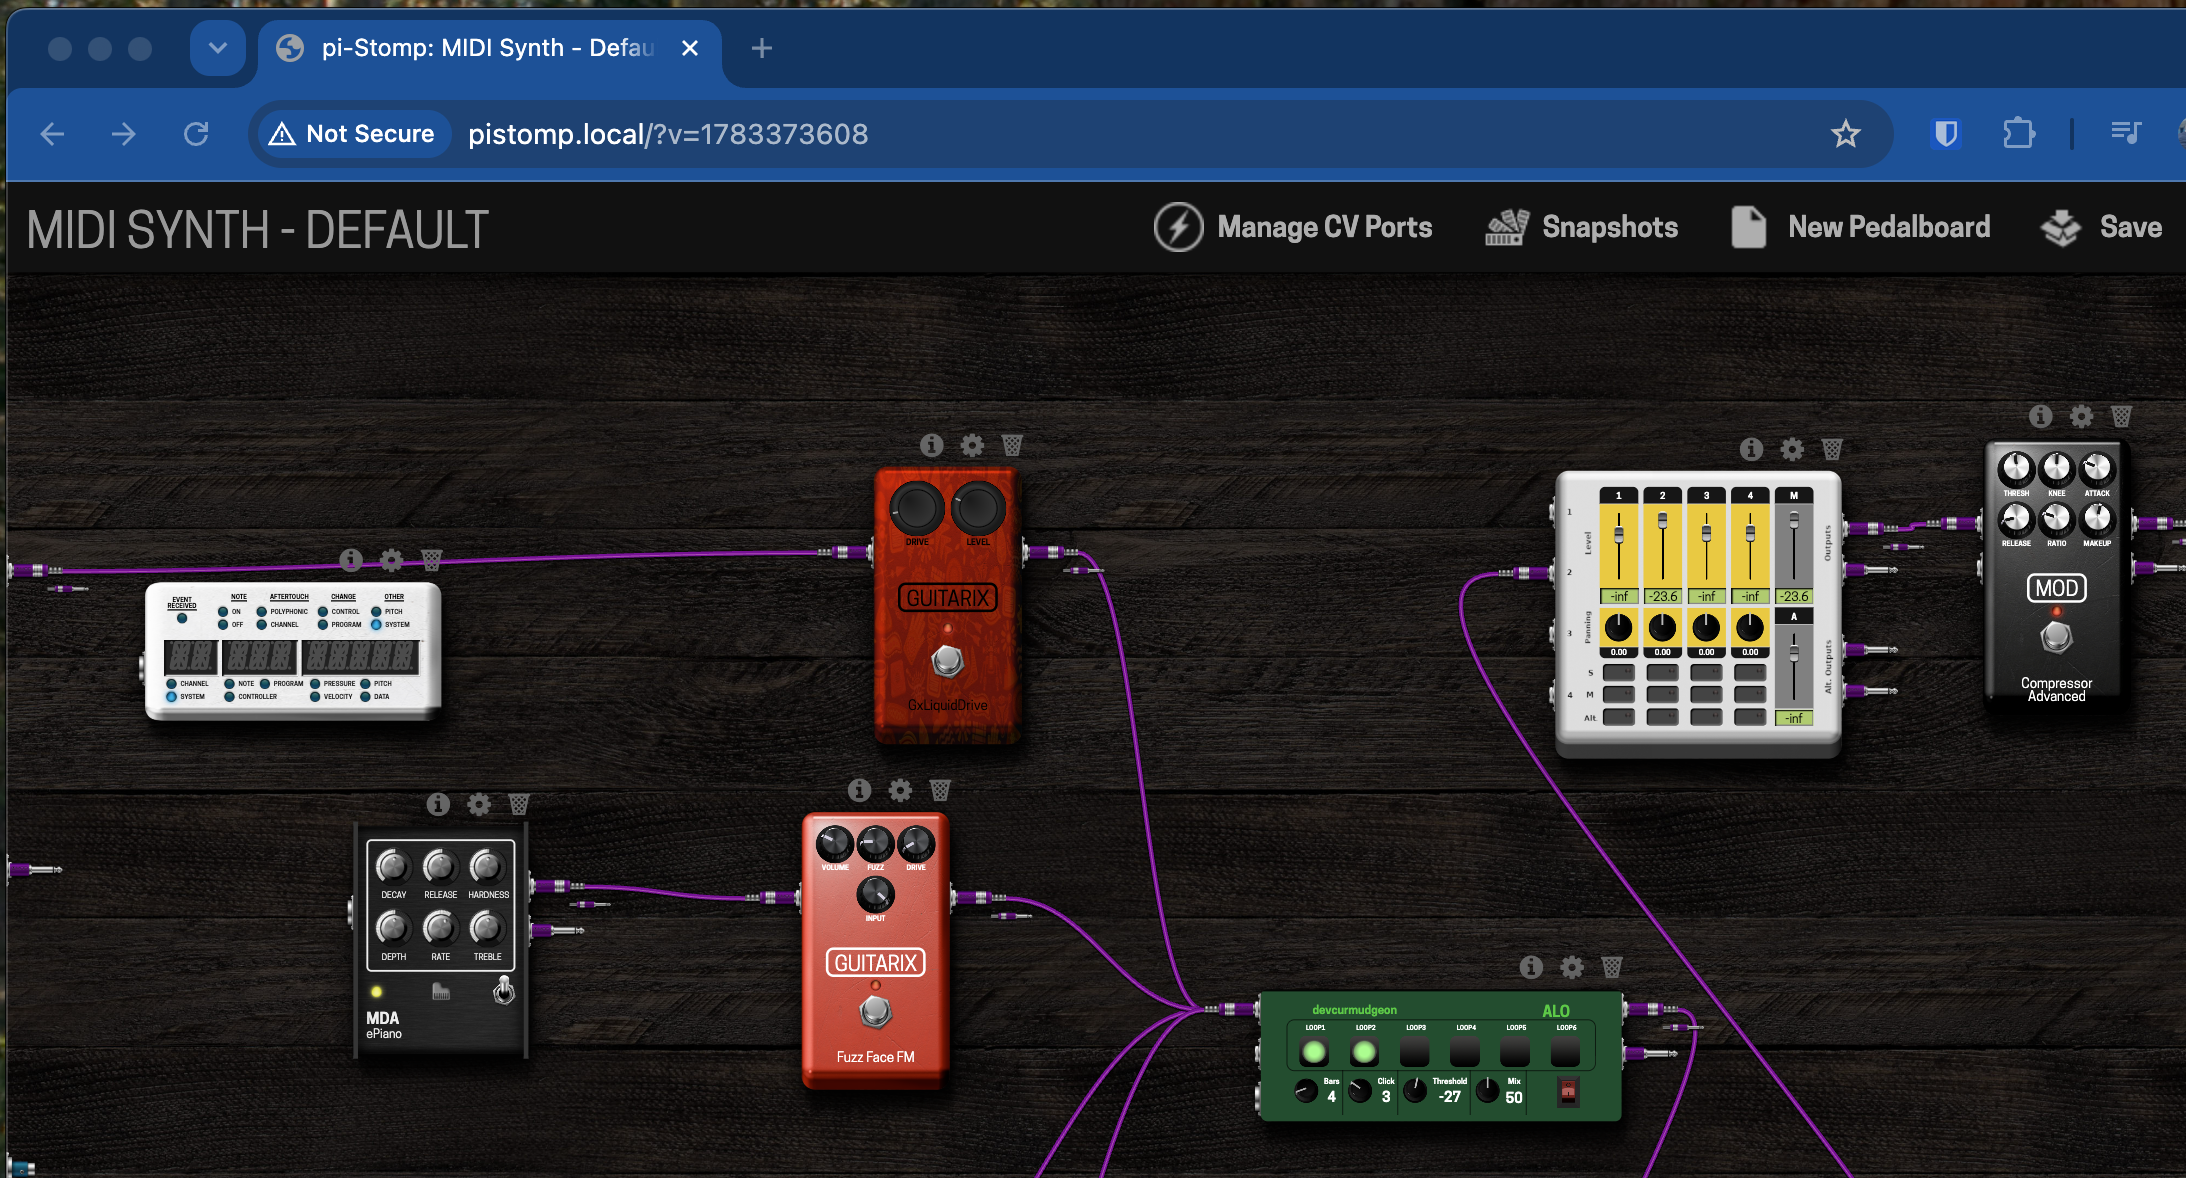
Open a browser on any device on the same network and go to http://pistomp.local/. This is MOD-UI, where you build pedalboards.
MOD-UI comes from MOD Devices, who make their own Linux-based pedals. pi-Stomp runs their editor and their plugin host (mod-host) rather than reinventing them, with pi-Stomp's own software driving the LCD, encoders, and footswitches on top. That's why the web editor looks like a MOD product: it is one.
That address works through mDNS, a protocol that lets devices announce their own names on a local network with no router configuration. Not every network passes it through. If the name doesn't resolve, get the device's IP address from the LCD instead: highlight the wrench icon in the toolbar with the Navigation encoder, click it, choose System info, and read the address on the Wi-Fi: line. Browse to that address directly.
What's next
The pi-Stomp boots with a pedalboard already loaded, so it's ready to make sound as soon as you plug in. Quick Start covers connecting your instrument and setting input gain.
Pre-release images
To help test upcoming releases, use https://treefallsound.github.io/pi-gen-pistomp/imager/pistomp-testing.json as the repository URL instead. These builds can have (literal) show-stopper bugs; avoid taking them on stage.
Alternative Install method - Configuring with pistomp.conf
This is the fallback path for Raspberry Pi Imager below v2.0.11-rc1, and the way to set options the wizard doesn't expose, like the JACK audio settings.
Older Imager builds do have customization screens, but they write a format this image doesn't read — the v1.9.x line used a different engine entirely. On those versions the wizard appears to work and its settings are silently ignored, so skip it and use pistomp.conf instead.
- Download the latest
.img.xzfrom pi-gen-pistomp releases (under "Assets"). - In Imager: Choose OS → Use custom → select the downloaded file.
- Choose Storage → select your microSD card → Write, skipping EDIT SETTINGS.
After flashing, the card's boot partition mounts as a small FAT volume named BOOTFS:
| Platform | Where to find it |
|---|---|
| macOS | /Volumes/BOOTFS, and on the Finder sidebar under Locations |
| Windows | A removable drive letter labelled BOOTFS in File Explorer |
| Linux | Usually /media/<user>/BOOTFS; otherwise mount the card's first partition |
Open pistomp.conf on that volume and edit:
| Setting | What to put | Default |
|---|---|---|
WIFI_SSID |
Your Wi-Fi network name | "" |
WIFI_PASSWORD |
Your Wi-Fi password | "" |
WIFI_COUNTRY |
Your country code (e.g. US, GB, DE, CA) |
US |
HOSTNAME |
Leave as pistomp |
pistomp |
USER_PASSWORD |
A password for SSH access | pistomp |
TIMEZONE |
Your timezone (e.g. America/Toronto, Europe/London) |
US/Central |
Save the file, eject the card, and continue from Step 6.
The file also carries the JACK_* audio settings. Leave those alone for now; Performance explains when to change them.
If both rpi-preseed.toml and pistomp.conf are present, they don't conflict: the preseed wins for the keys it covers (Wi-Fi, hostname, password, timezone), and pistomp.conf still supplies everything else.
Troubleshooting
- pi-Stomp OS doesn't appear in the Choose OS list — recheck the repository URL for typos, then APPLY & RESTART again; the list only reloads on restart.
- Nothing on the LCD after a minute — check that the SD card is fully seated and the power supply is adequate (27W recommended).
pistomp.localdoesn't resolve — confirm your computer is on the same network, then use the IP address from System info as described in Step 4. Some routers and most corporate or guest networks block mDNS.- Wi-Fi not connecting — recheck the network name and password; the name is case-sensitive. Check the country code too: a wrong one can disable the channels your network uses.
- The Imager wizard settings were ignored — the wizard needs Imager v2.0.11-rc1 or newer. Either upgrade Imager or use
pistomp.conf. - The LCD said "Imager setup FAILED" — the preseed file was present but didn't apply, which would otherwise leave the device with no Wi-Fi and no credentials. The pi-Stomp falls back to
pistomp.confand keeps booting. Configure it using the fallback path.